Answer
Lightning Payroll desktop lets you create shift types and schedule a roster of shifts for your employees. Rostered shifts can then fill in your pays automatically, saving time on data entry.
For related timeclock information, see How Do I Use the Lightning Payroll Timeclock App?
Company Shifts
To start setting up shifts, go to Company >> Shifts.
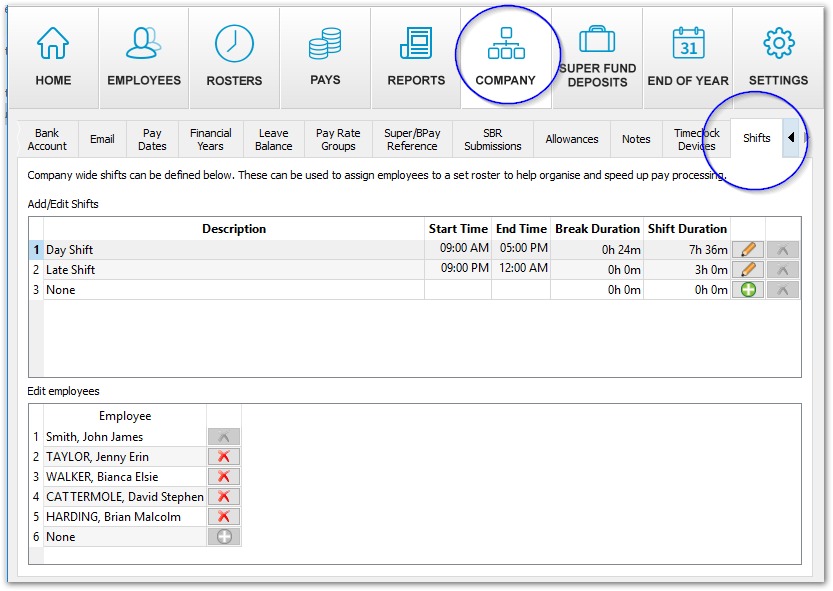
To add a new shift type, use the green plus button on the right. Then add any employees who may be required to work this shift at the bottom of the screen.
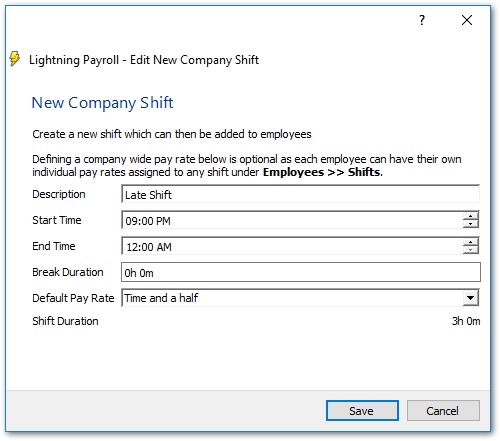
In the New Company Shift screen, the times, durations and pay rate are only defaults, or placeholders, for this shift type. That is fine if a shift type is likely to change, because any shift can be tailored for a particular employee or a particular date elsewhere, as described below.
Pay Rate Warnings
Shifts at the company level can include a default pay rate, for example Ordinary Time or Double Time. Pay rates can also be set at the employee level for specific shifts, under Employees >> Shifts.
If more than one pay rate ends up connected to the same shift for an employee, Lightning Payroll shows a warning before you proceed. We recommend using one method or the other to connect pay rates to shifts. If you plan to set employee shift pay rates directly, do not also set a default company pay rate for that shift.
If you have intentionally applied two pay rates to a shift you can safely disregard the warning. Otherwise, check that the correct rate is selected for each employee.
Employee Shifts
If an employee tends to receive a particular pay rate or allowance, or works a shift on a regular basis, you can configure this under Employees >> Shifts.
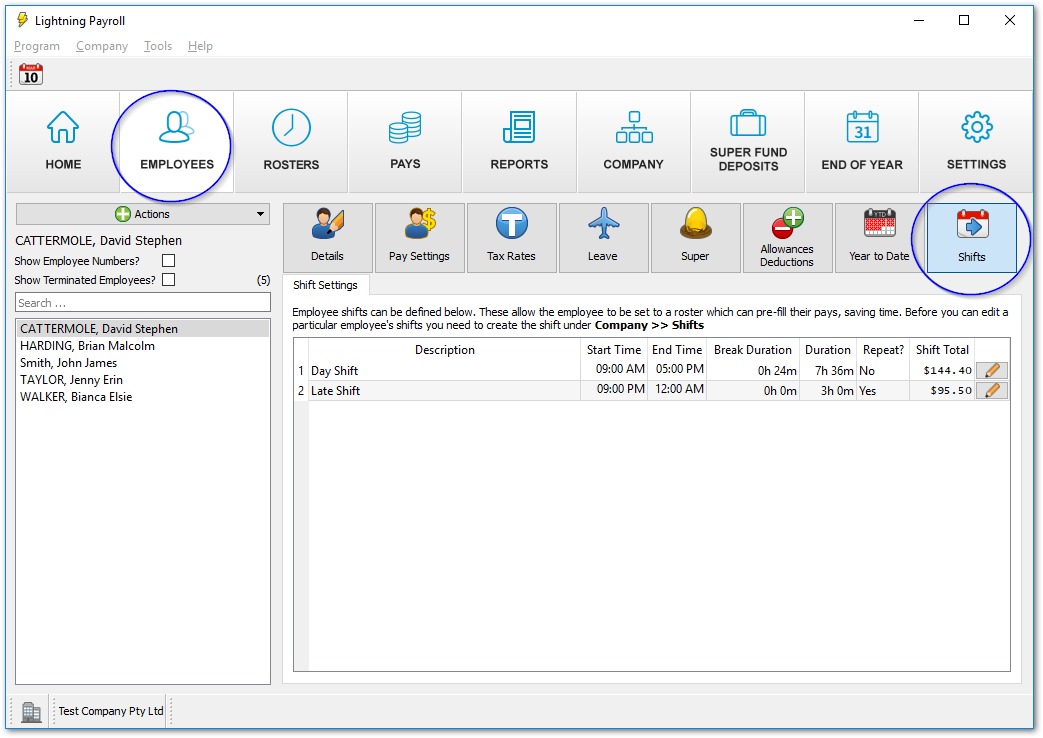
All company shifts linked to an employee appear in this screen. To customise a shift for an employee, use the pencil button to the right of the shift.
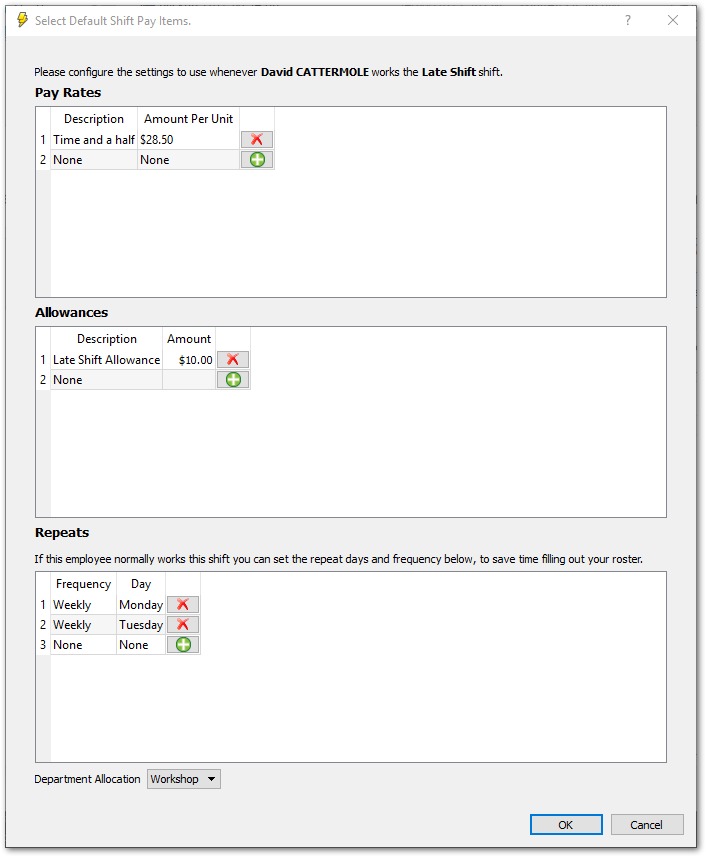
Note: If an employee has been assigned to any departments, these are available for allocation at the bottom of this screen, and are reflected on departmental reporting once rostered shifts are imported into the Pays area later on.
Roster Shifts
Rostered shifts can be viewed, edited and manually scheduled under the Rosters section of Lightning Payroll.
Repeating shifts generate automatically when you first view a pay run within the Rosters screen. If you accidentally edit or delete any rostered shifts and want to return everything to the starting point, use the Reload Repeats button.
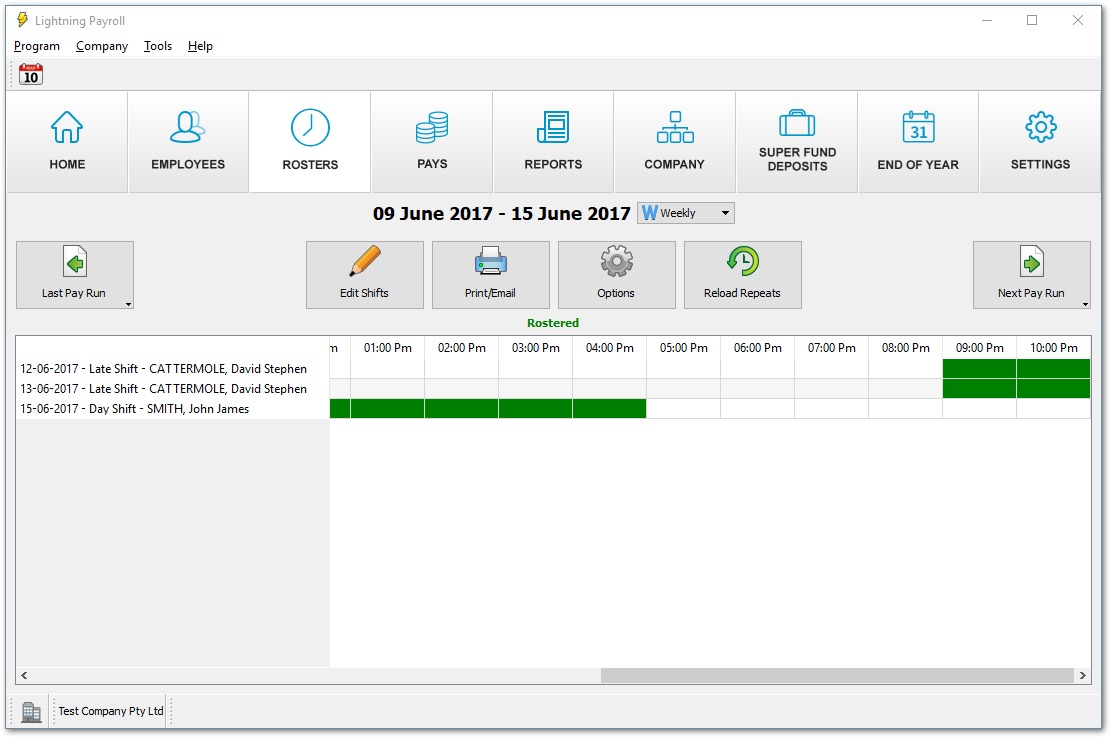
To add or edit the rostered shifts worked during this pay run, click the Edit Shifts button.
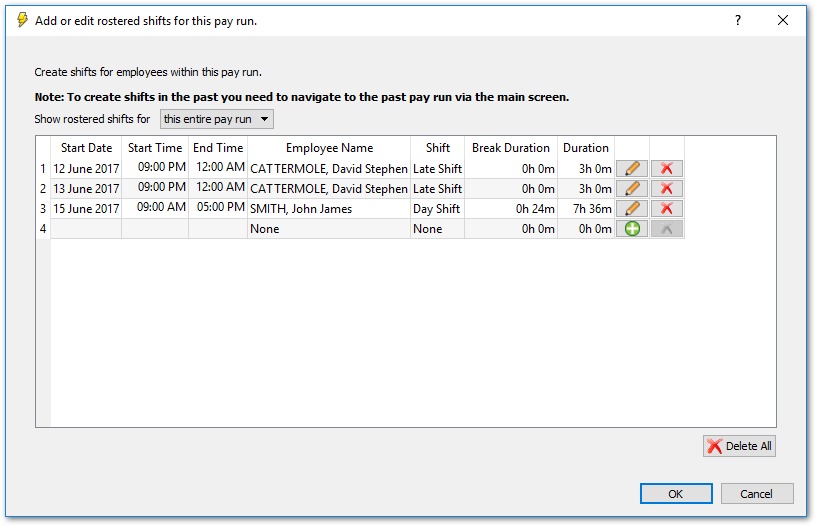
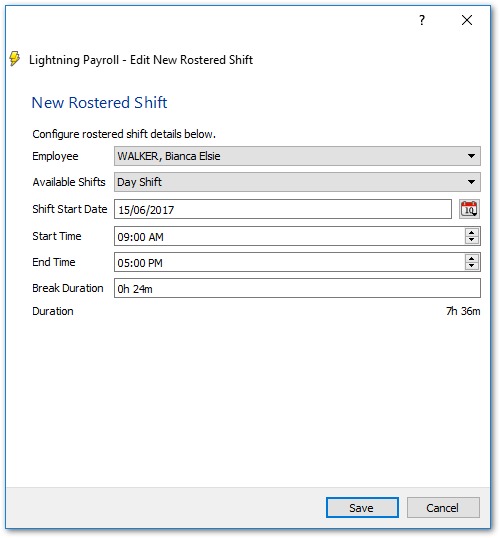
To add a new, one-off shift manually, use the green plus button. You then see the New Rostered Shift screen. When creating a shift, keep in mind that break durations are not paid.
Options
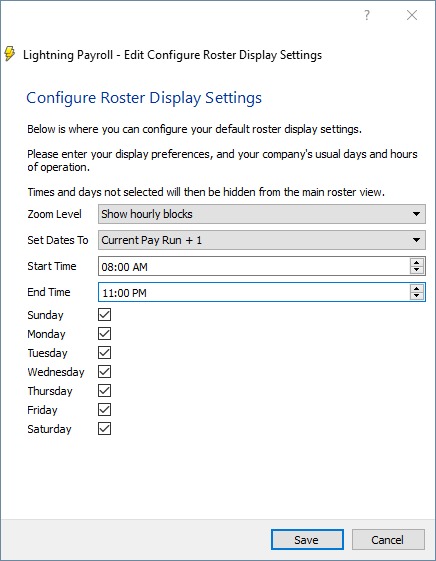
The Options button lets you customise the display of your Rosters screen. For example, you can set your business operating days and hours so the program does not show unnecessary days or time periods. If you roster your pay runs two or three pay periods in advance, you can set the default pay run offset, which tells the program how far into the future the Rosters screen should display by default.
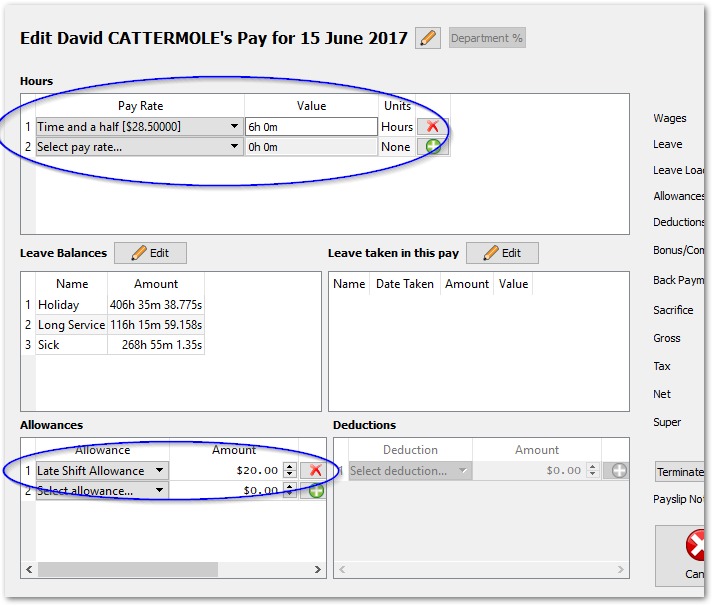
Rostered Shifts and Pays
Once rostered shifts have been created, they are used automatically to populate the pay information in Lightning Payroll. Where there is no rostered shift, pays generate using the employee's default settings configured under Employees >> Pay Settings.

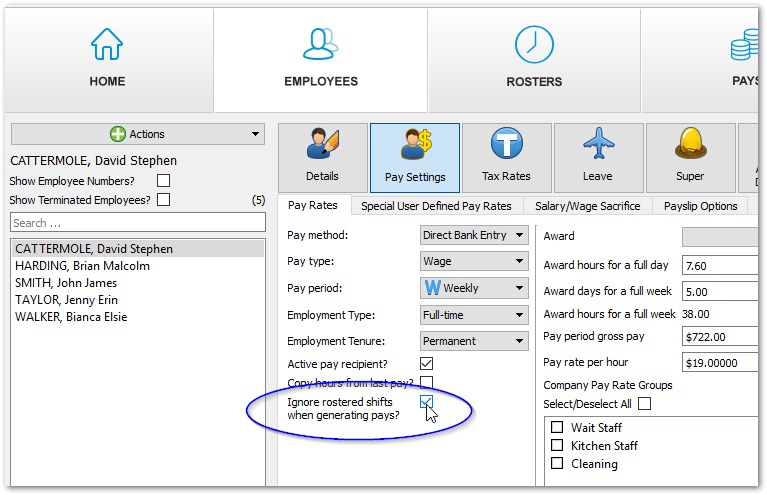
If you want to use the Rosters section but not have rostered shifts modify your pays, go to Employees >> Pay Settings and tick the box to Ignore rostered shifts when generating pays.